Download and Install BreviSoft PST Converter Tool on your system.
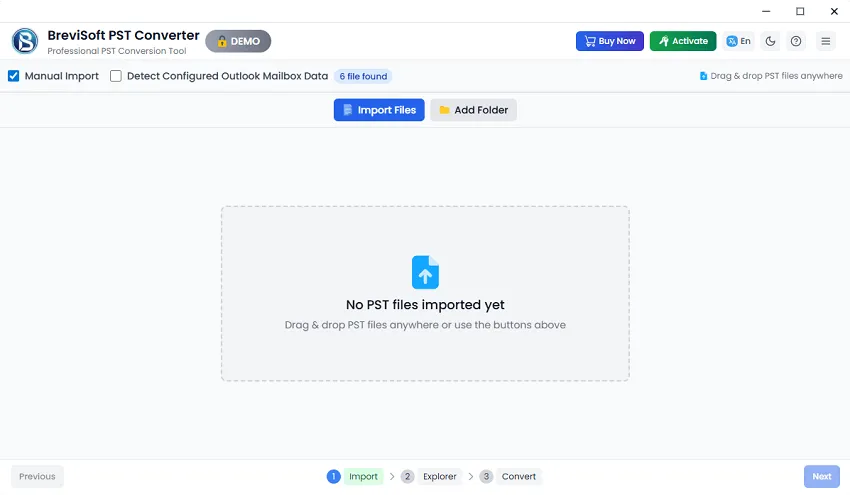
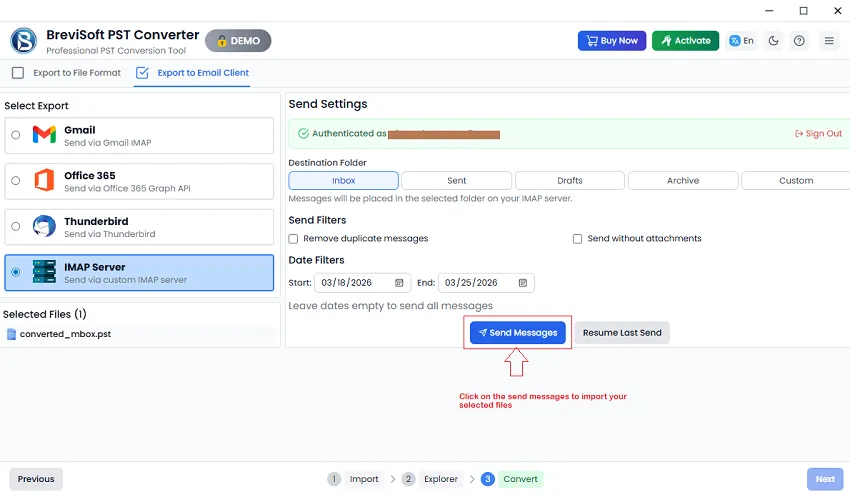
Add PST File Using Either Manual Import Option or Detect Configured Outlook Mailbox Data.
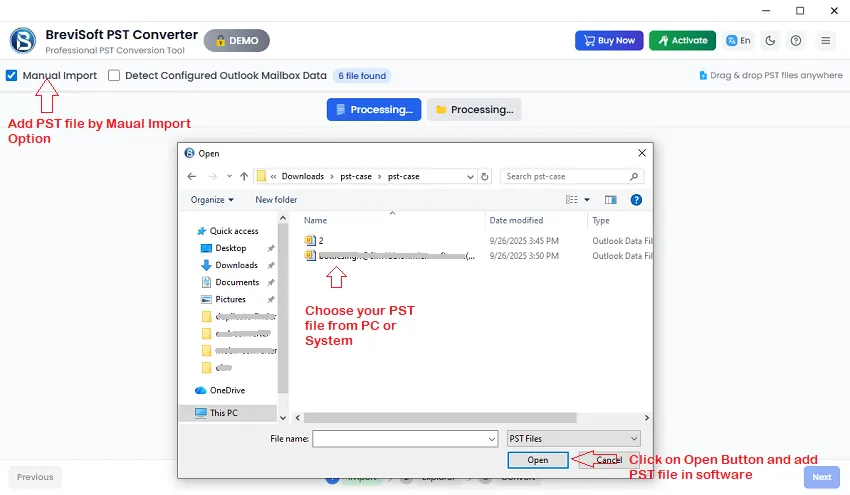
Note In the Manual Import option you can simply click on the Import Files button and add PST files.

Select PST file From your system or PC by Manual Import options.
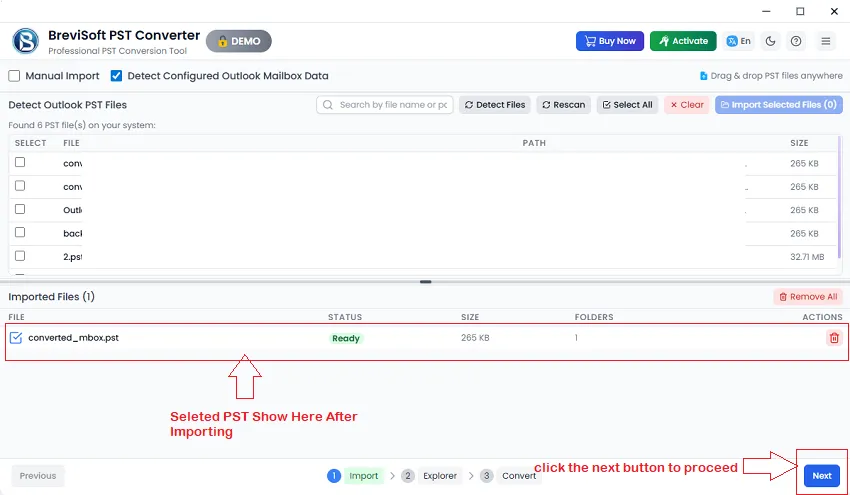
Add or Select PST File by Detect Configured Outlook Mailbox Data option.
Note In the Manual Import option you can simply click on the Import Files button and add PST files.
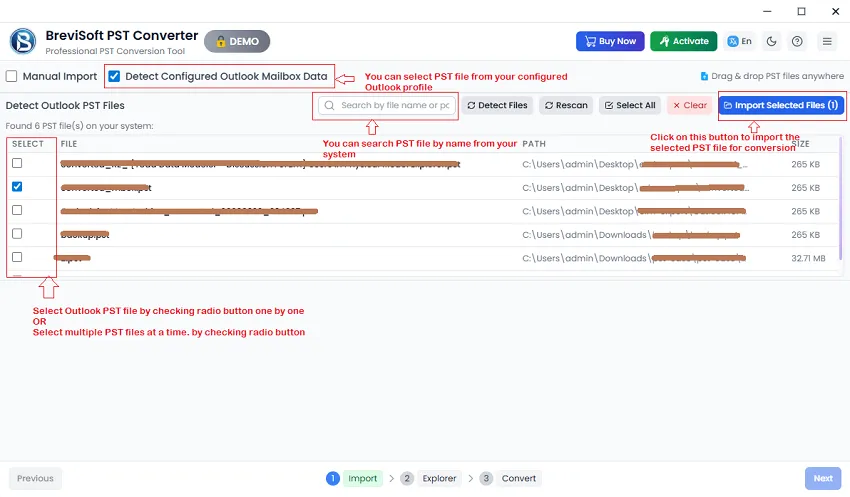
Select PST File and Click on Import Select File button then press on Next button.
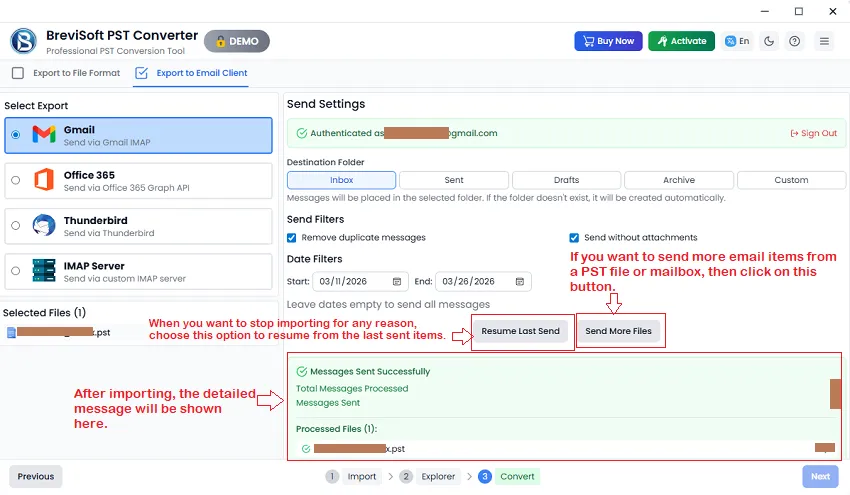
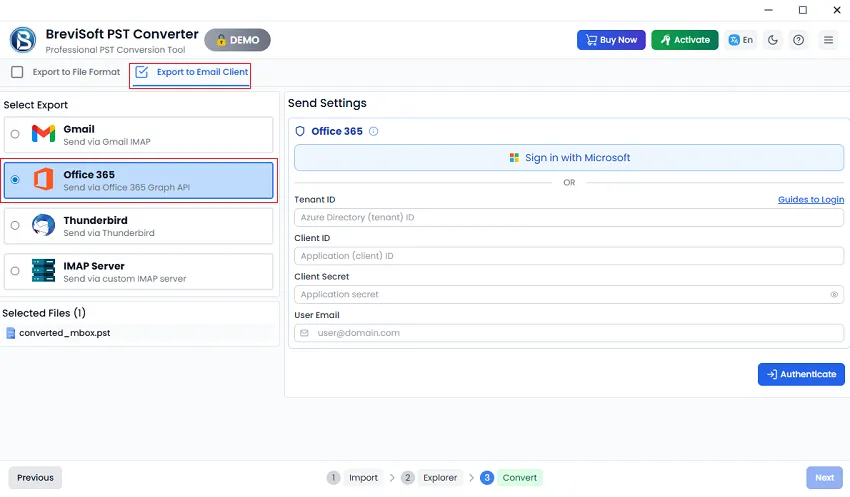
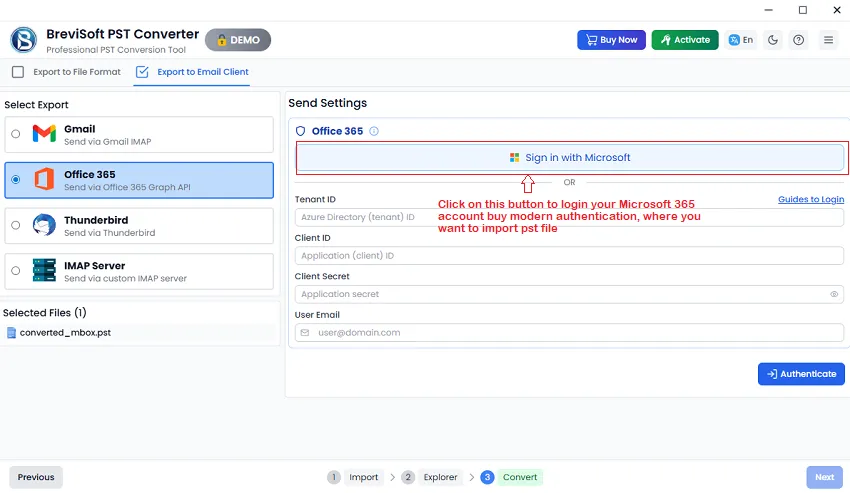
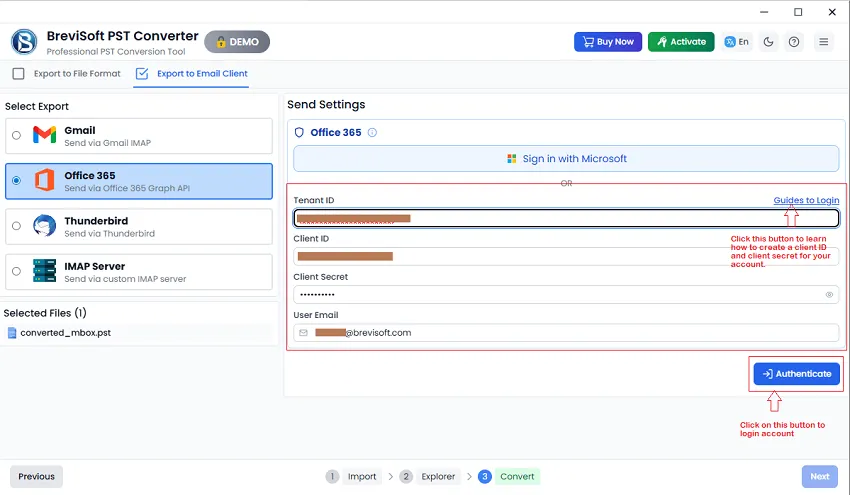
Now, select Email items and preview them with all details.

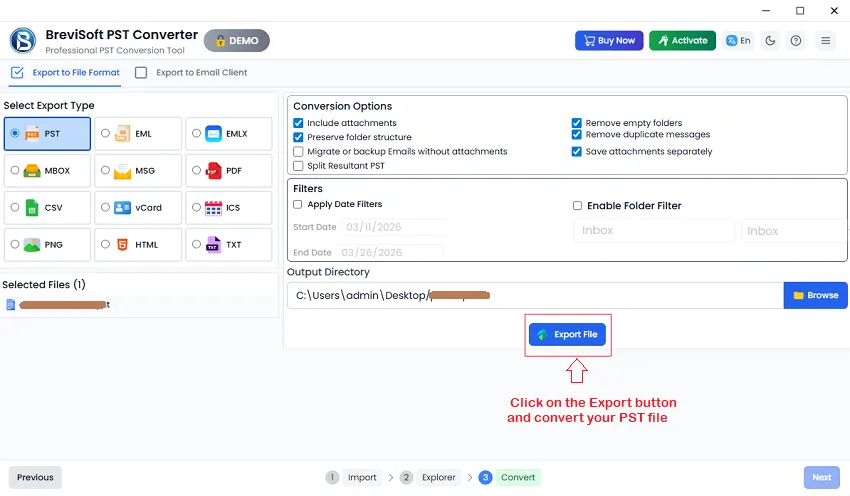
Click on Next button and choose PST file formats from Select Export Types options.
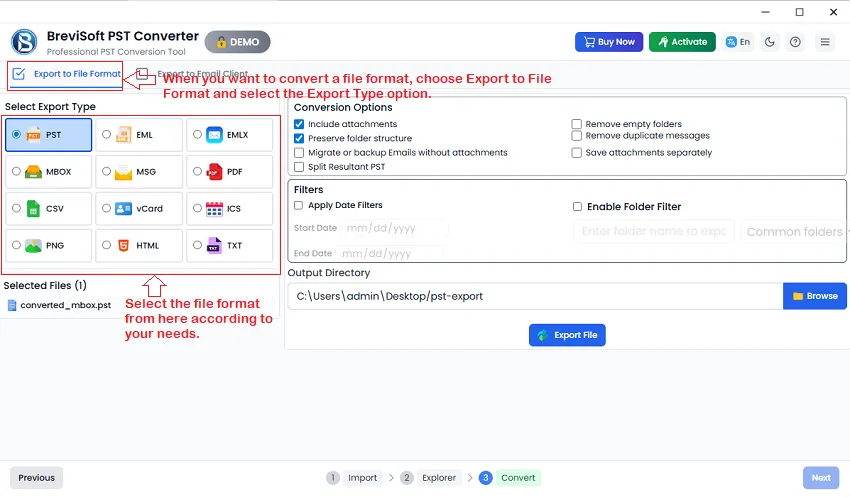
Checkout Conversion Options
- Include Attachments
- Preserve folder structure
- Migrate or Backup emails without attachments
- Split Resultant PST
- Remove Empty Folder
- Remove Duplicate Messages
- Save Attachments Separately
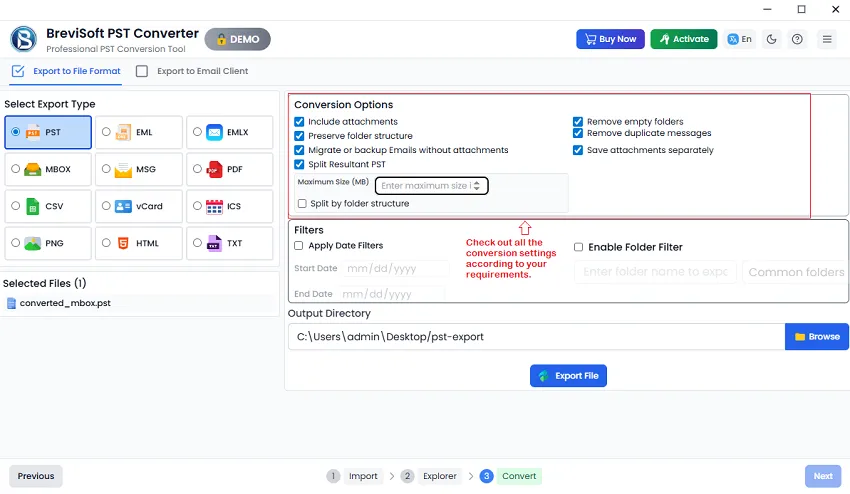
Main Point - The Split Resultant PST options only applicable when you convert a PST file into a new PST file
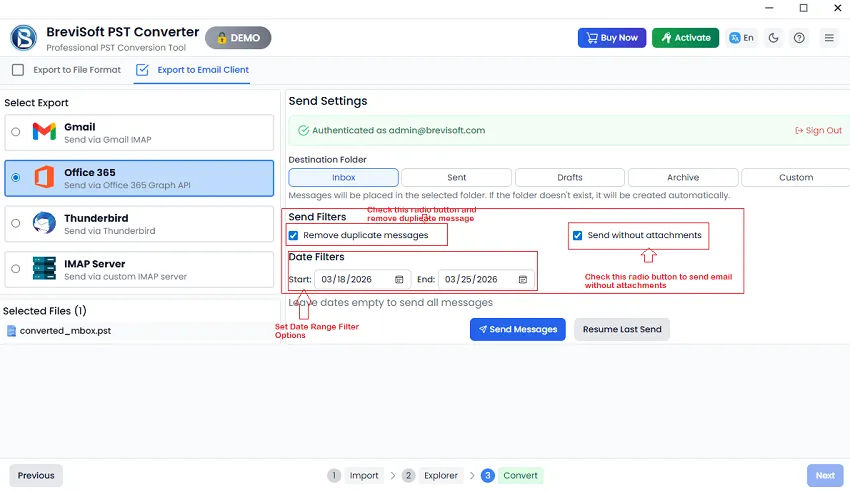
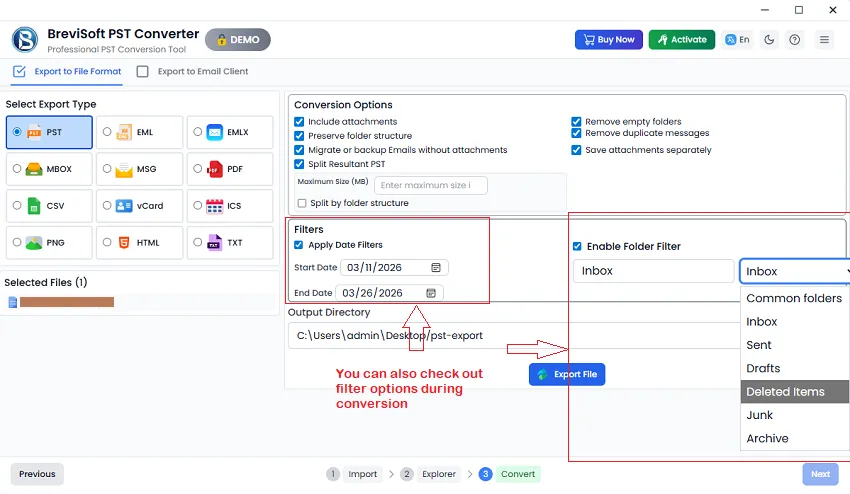
Filter Options: You can also check out filter options during conversion
- Apply Date Filters
- Enable Folder Filter
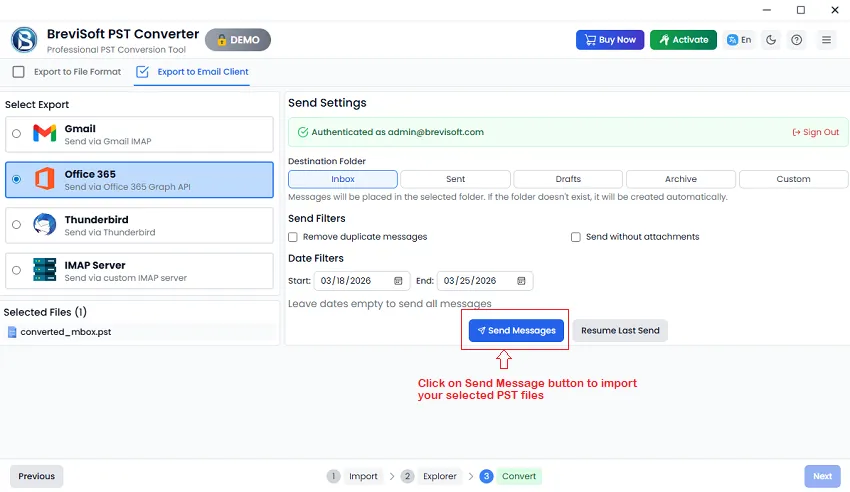
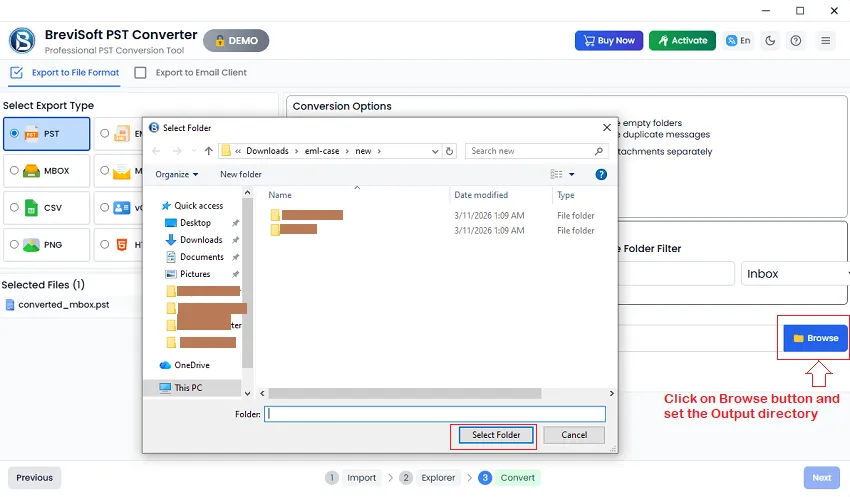
Click on Browse button and set the Output directory.
Click on the Export button and convert your PST file successfully.
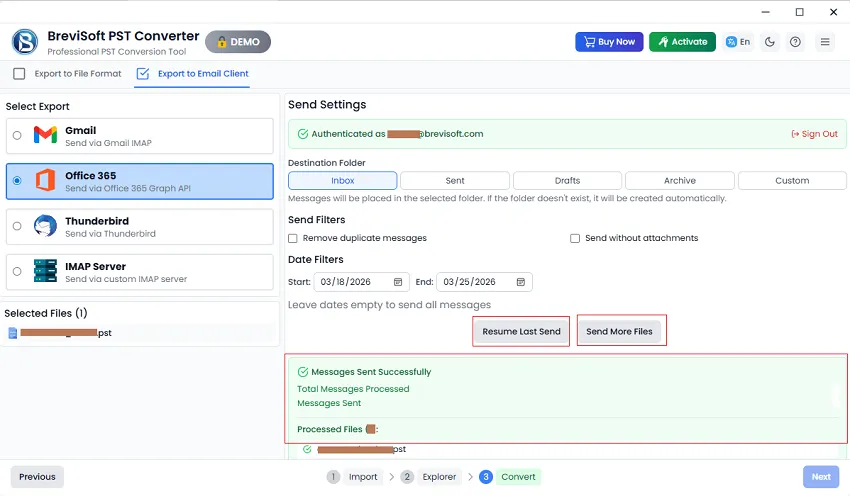
Now you can check the converted PST file in the output directory after successful conversion.

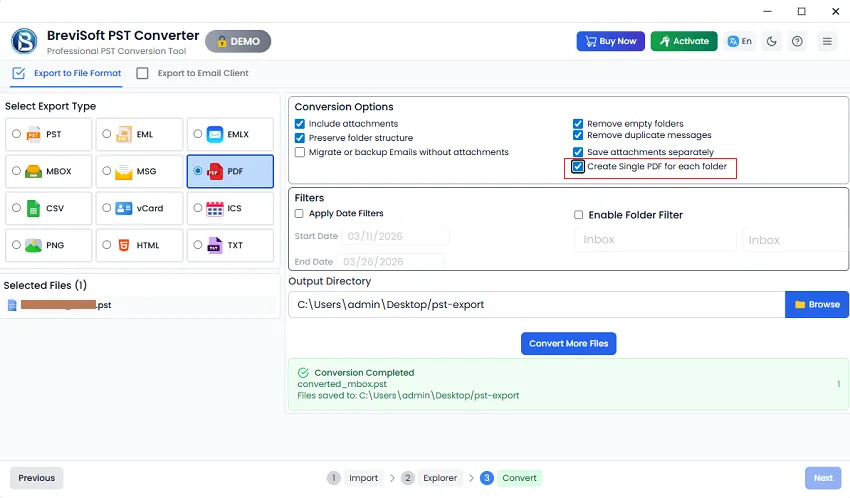
Note: The procedure is the same when converting a PST file into EML, MSG, EMLX, TXT, PST, MBOX, HTML, ICS, vCard, CSV, and PNG formats. However, when converting to PDF, the “Create Single PDF for Each Folder” option is additionally available for users.