How to Create Yahoo App Password?
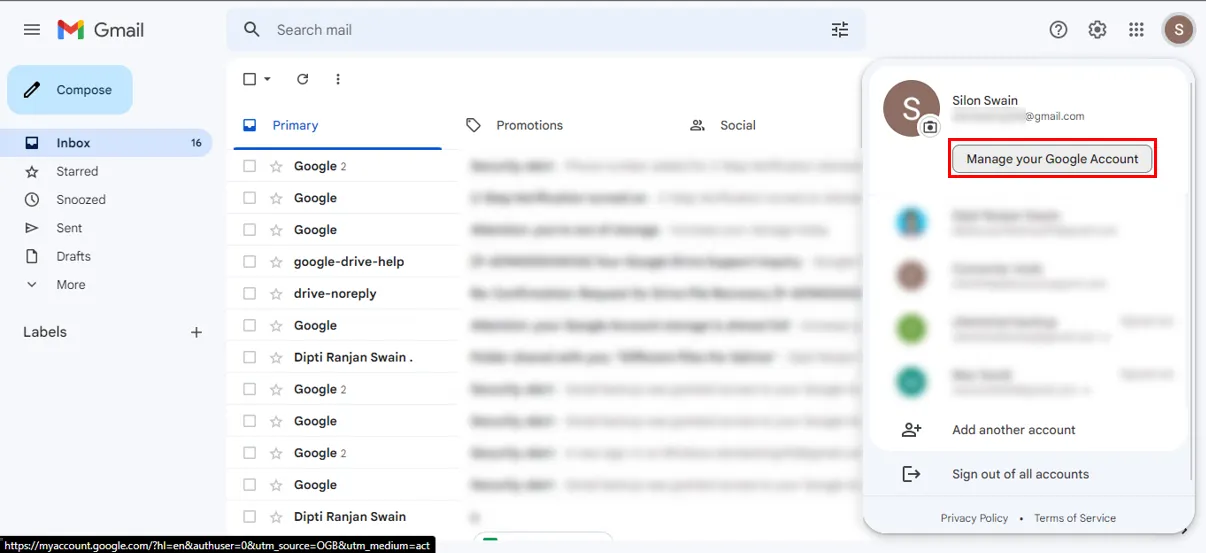
Step 1: Log in to your Gmail account. Click your profile image in the top-right corner and select Manage your Google Account.
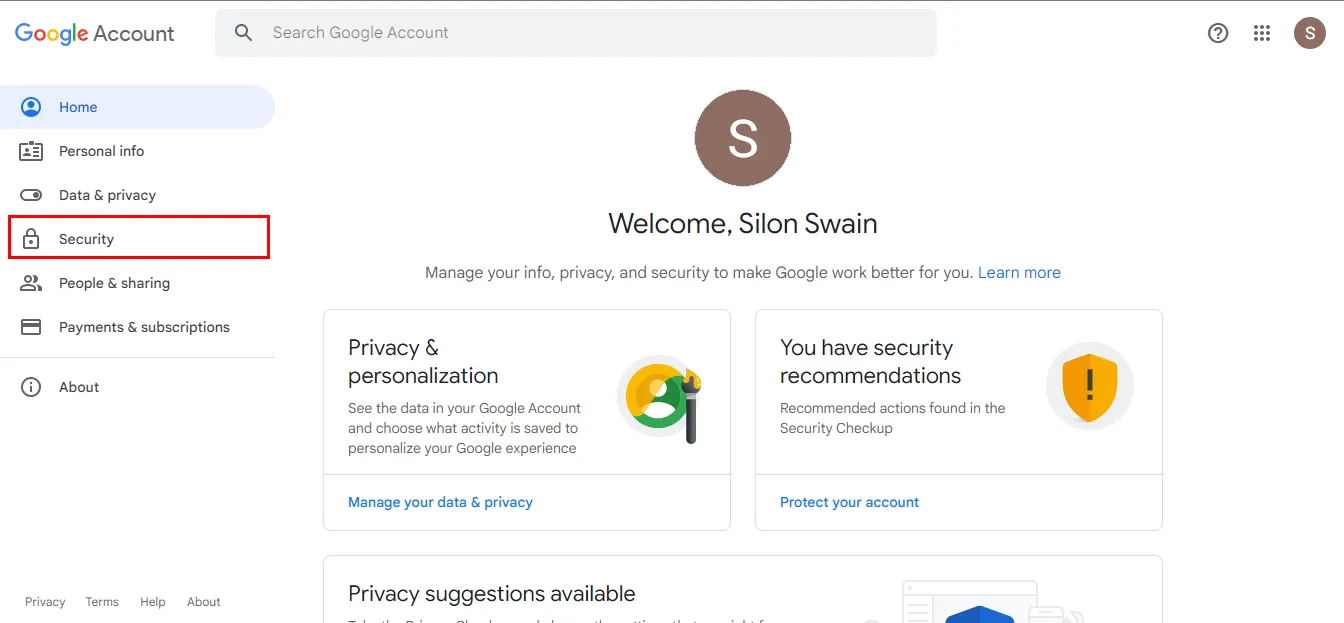
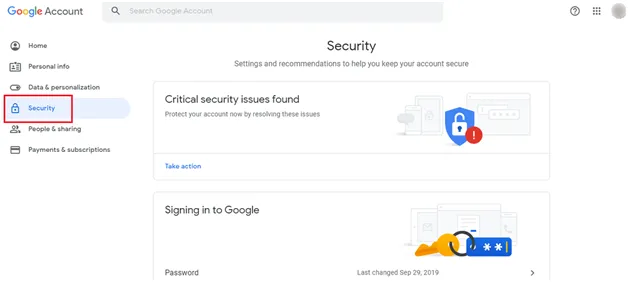
Step 2: From the left sidebar, click on Security.
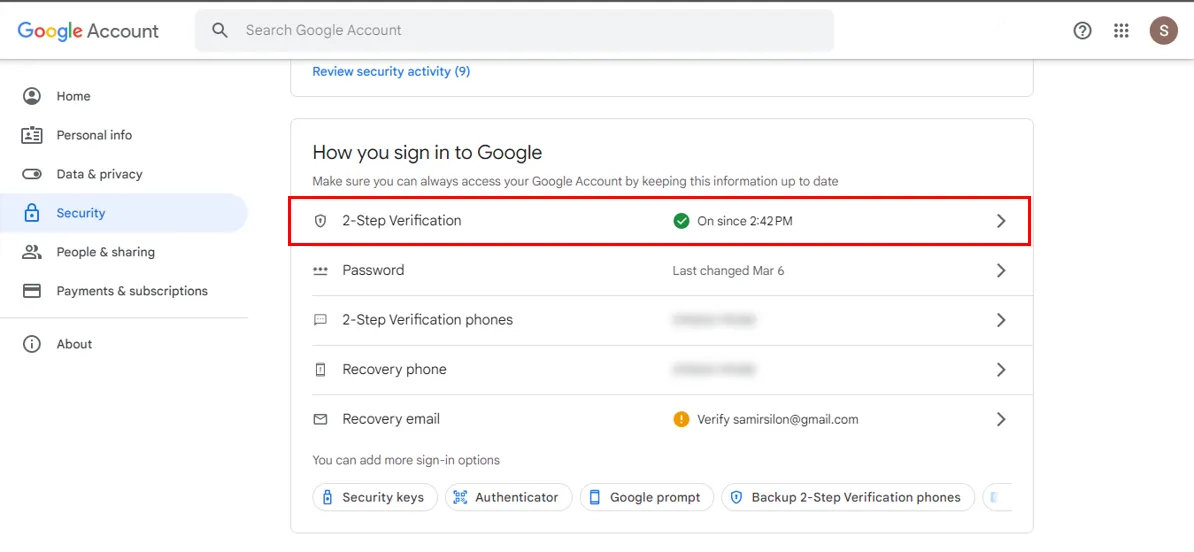
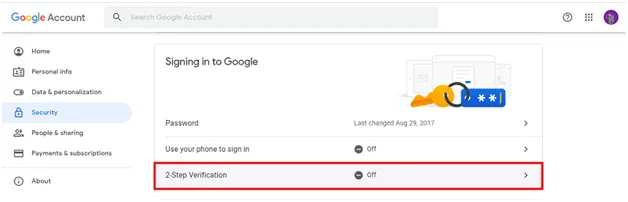
Step 3: Scroll down and select 2-Step Verification.
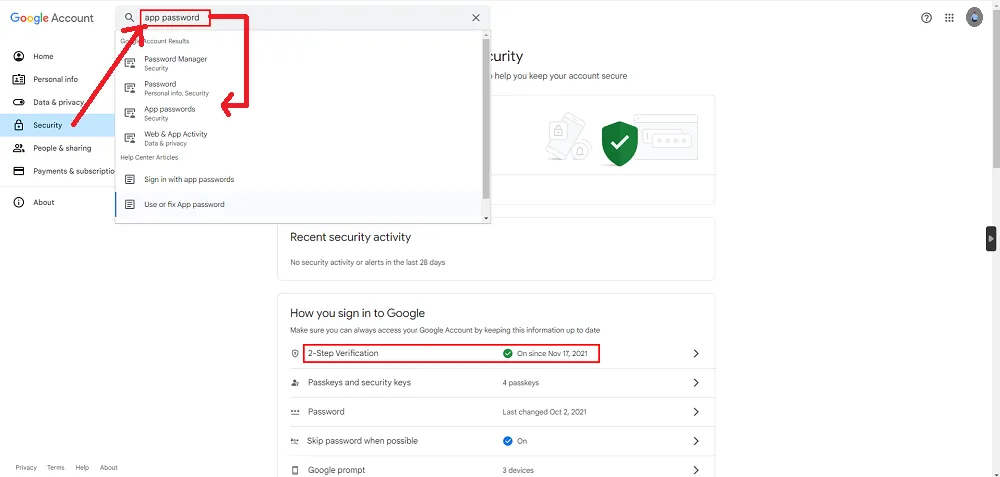
Step 4: After enabling 2-Step Verification, navigate to App Passwords and click on it.

Note: If you don’t see the App Passwords option, go to Security and type App Password in the search bar. Select it from the dropdown list.
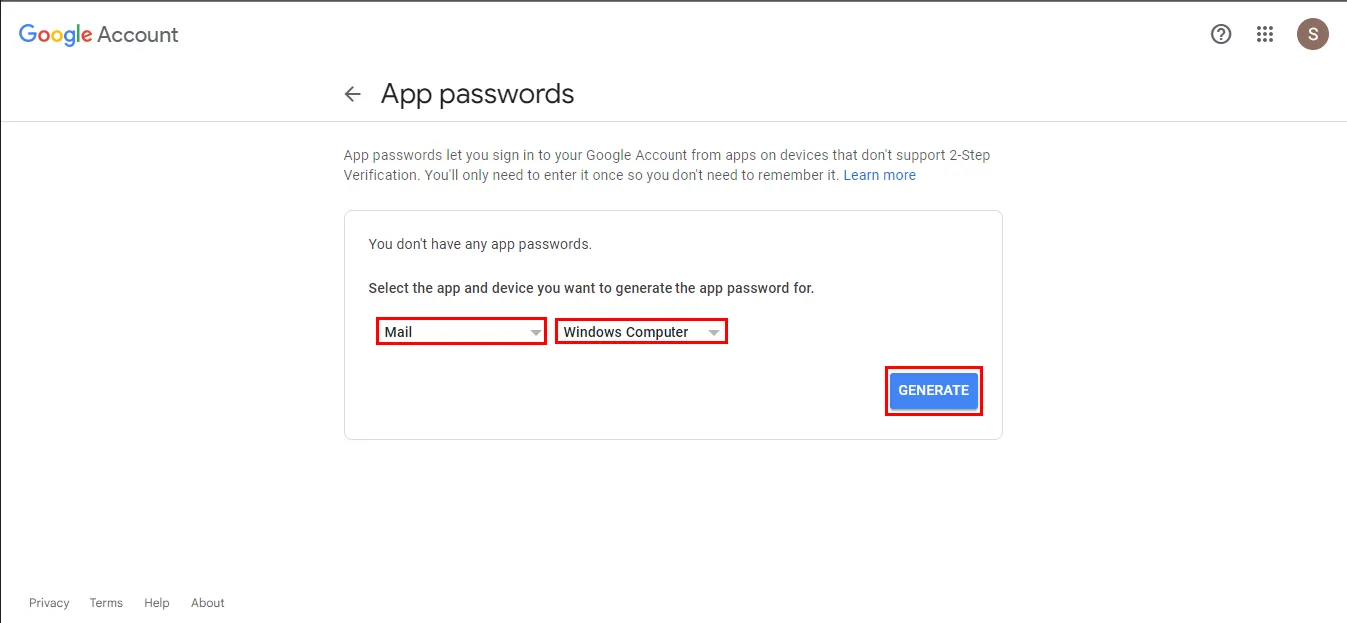
Step 5: Choose the app and device for which you want to generate the app password, then click Generate.
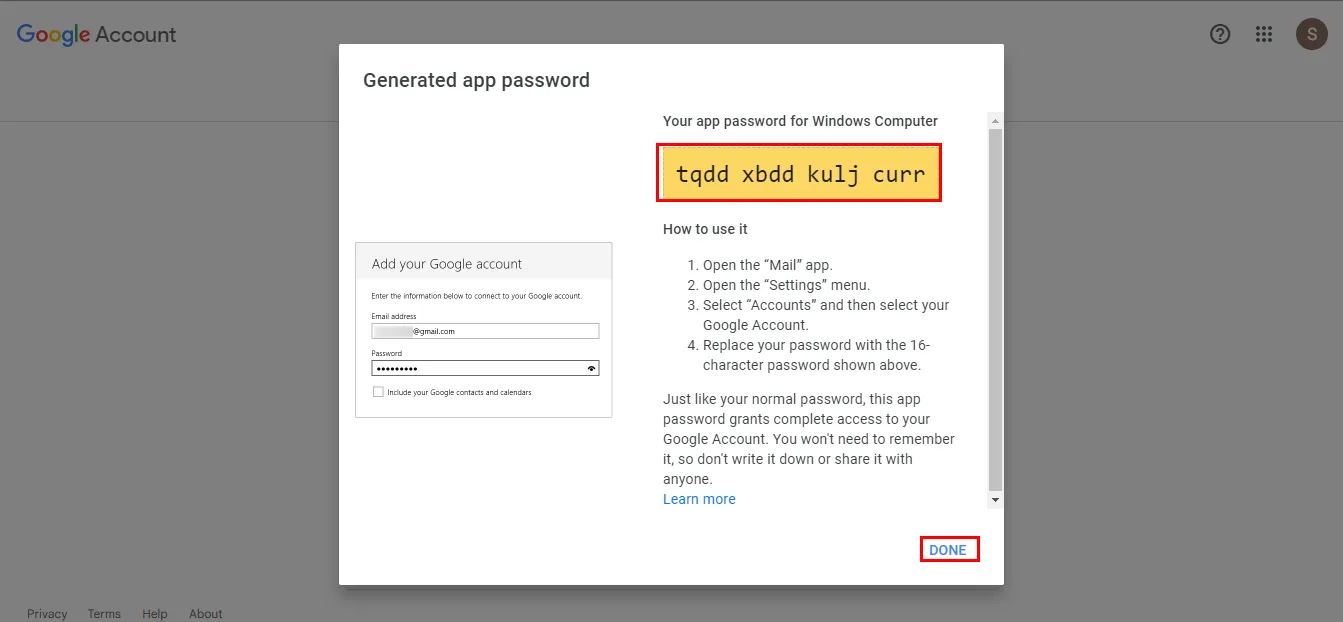
Step 6: A pop-up will display your app password. Copy and save it for future use, then click Done.
Step 1: Open your Google Account.
Step 2: From the navigation panel, click on Security.
Step 3: Under Signing in to Google, select 2-Step Verification, then click Get Started.
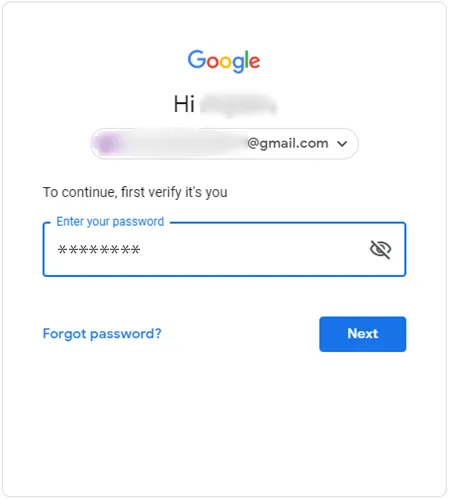
Step 4: Enter your Gmail account password and click Next.
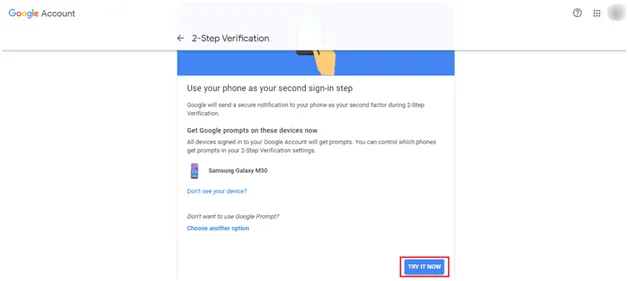
Step 5: Select Try It Now to begin setting up Google Prompts.
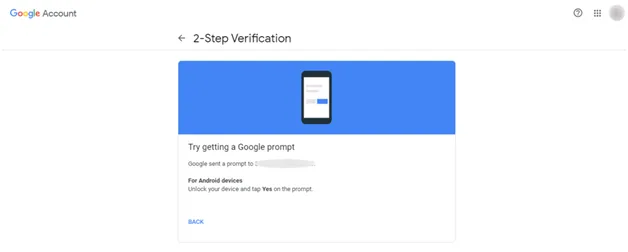
Step 6: Google will send a prompt to your registered devices. Tap Yes on your device to continue.
Optional: If you prefer another verification method (security key, text message, or voice call), click Choose another option and follow the on-screen instructions.
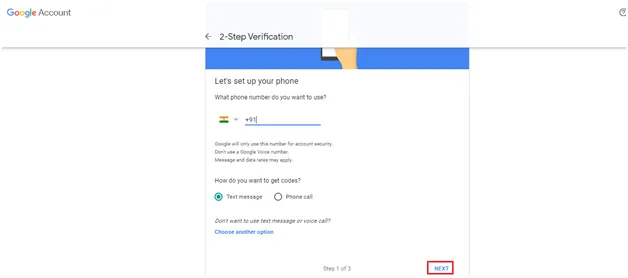
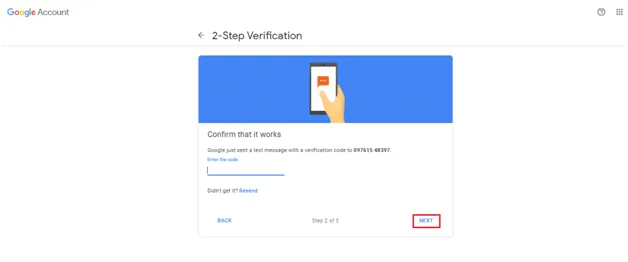
Step 7: Google will ask you to add a backup verification method. Enter your phone number if required, choose Text message or Phone call, and click Send.
Step 8: Enter the verification code you receive and click Next.
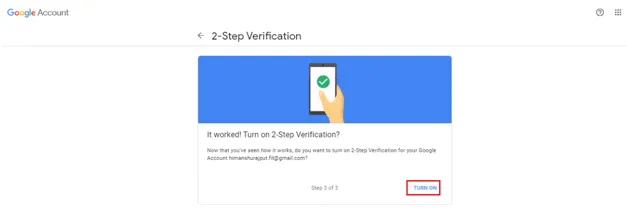
Step 9: When prompted, click Turn On to enable 2-Step Verification. You will now be required to complete a second verification step every time you sign in to Gmail.
Note: If you are using BreviSoft Gmail Backup Tool, first enable 2-Step Verification in your Gmail account and generate an App Password. Then, launch the software and sign in using your Gmail ID and the generated app password to continue with the backup process.
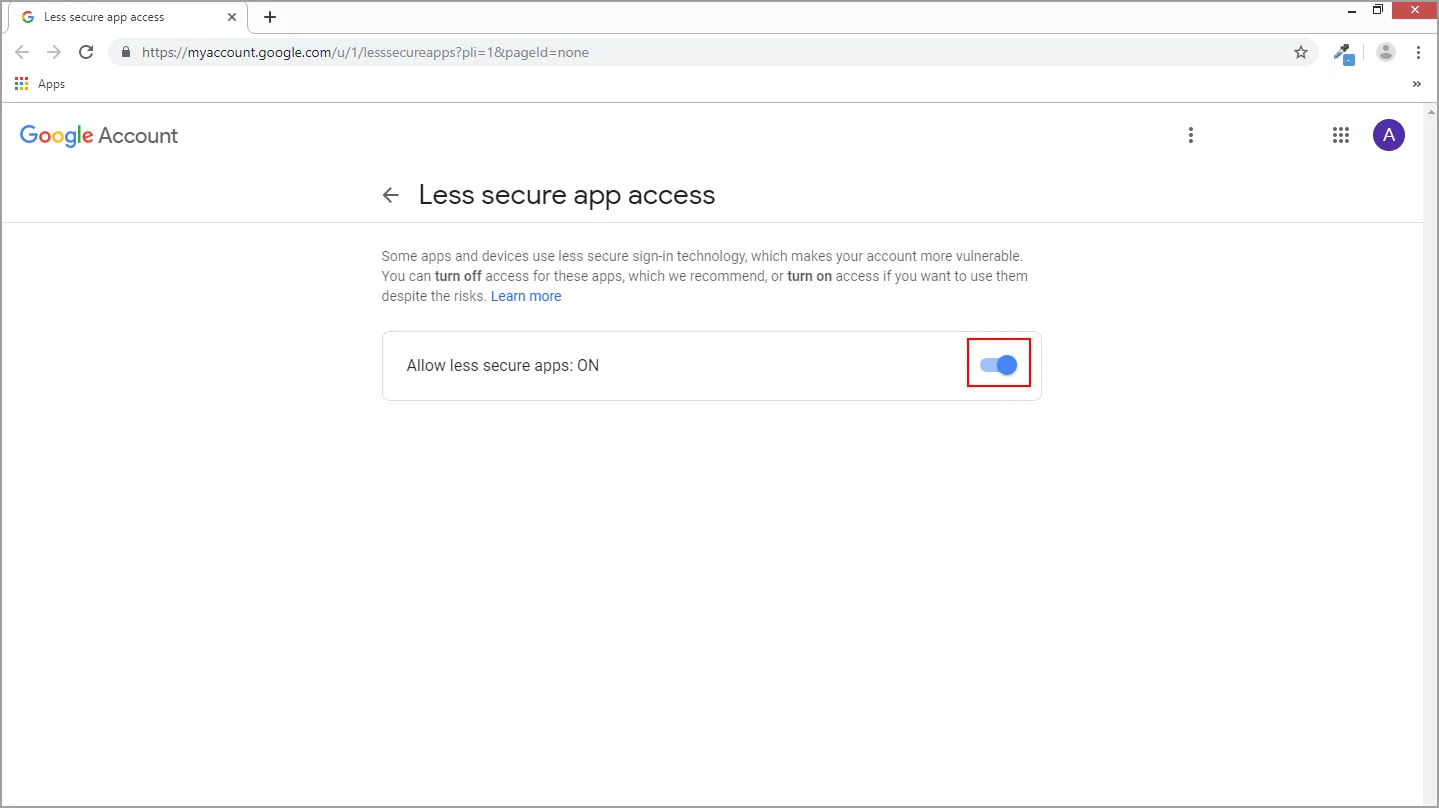
Step 1: Sign in to your Gmail account and open Less Secure Apps settings. https://myaccount.google.com/lesssecureapps?pli=1
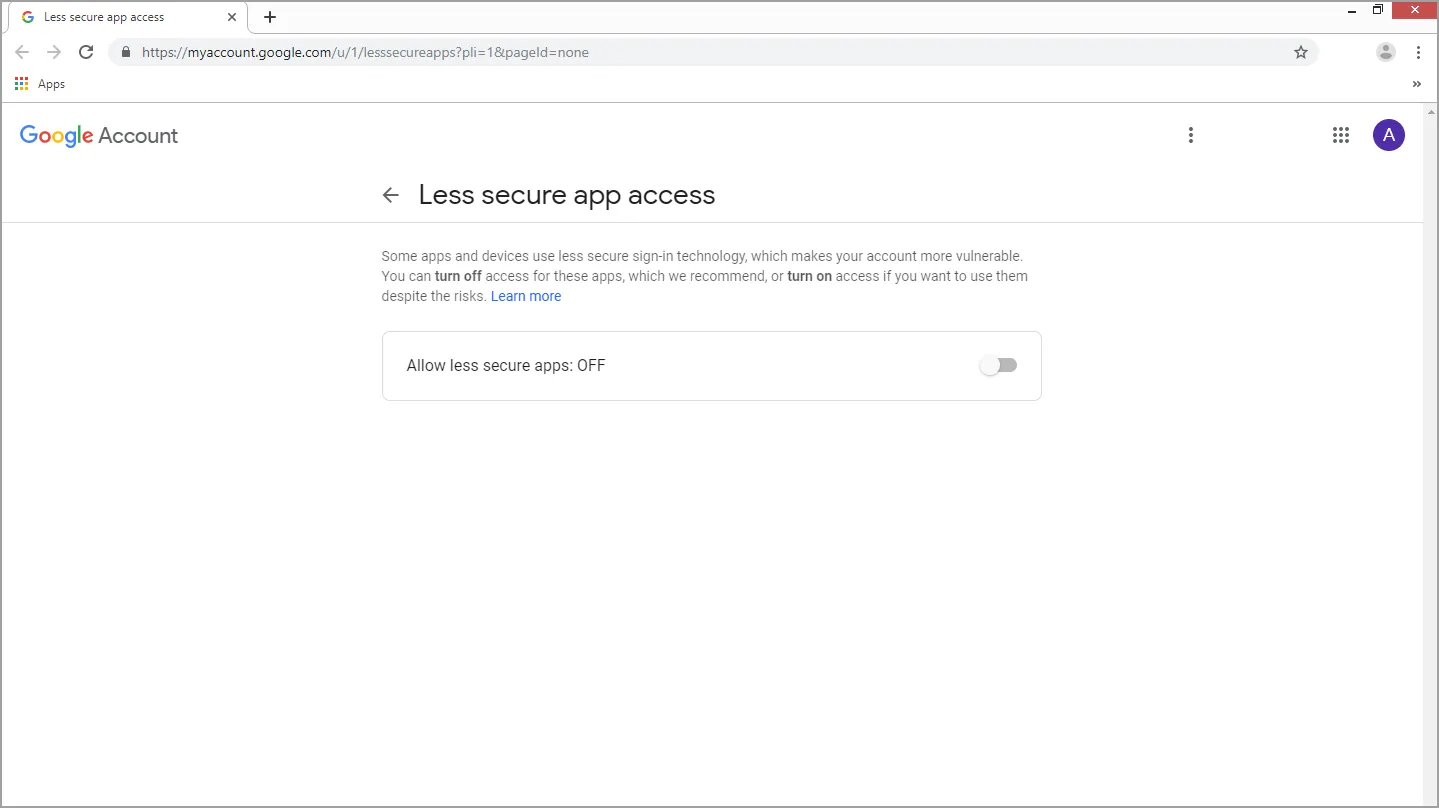
Step 2: Navigate to Gmail → Security Settings, then turn the toggle ON to allow access for less secure apps.
Enable IMAP in Gmail (Google Mail)
IMAP (Internet Message Access Protocol) allows you to access and manage your Gmail messages from multiple IMAP-compatible email clients. Emails remain stored on Google’s servers while syncing across devices.
Note: To access Gmail using other email clients, IMAP must be enabled. Follow the steps below:
Steps to Enable IMAP in Gmail
Step 1: Open Gmail and sign in using your account credentials.
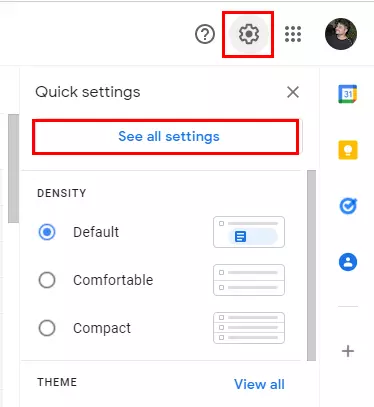
Step 2: Click the Settings (gear) icon and select See all settings.
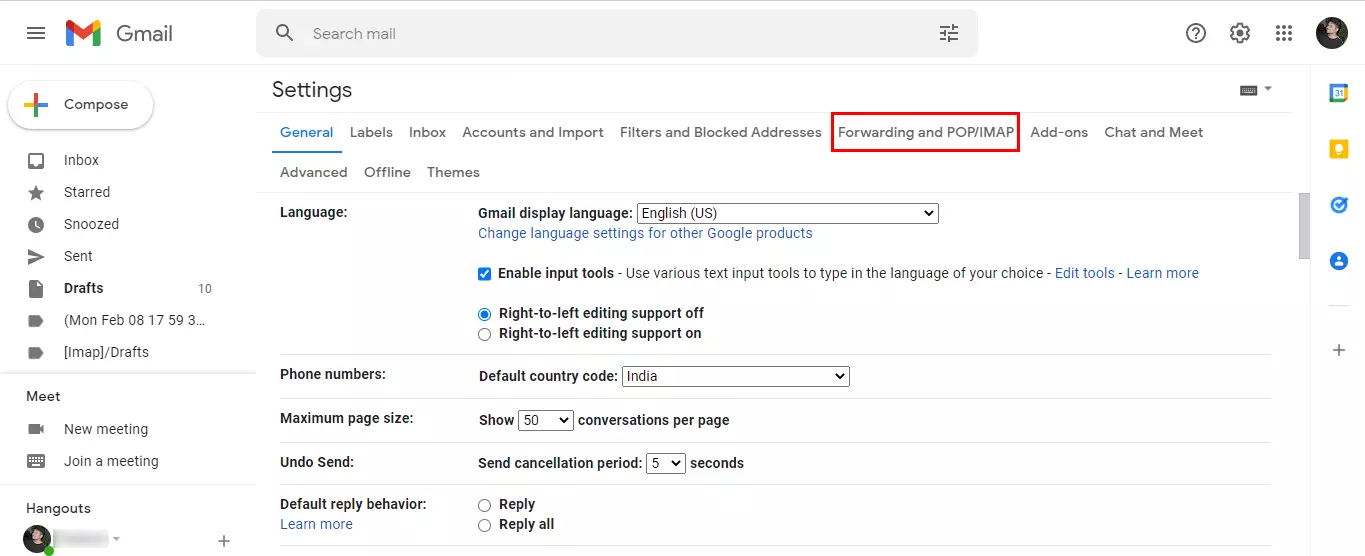
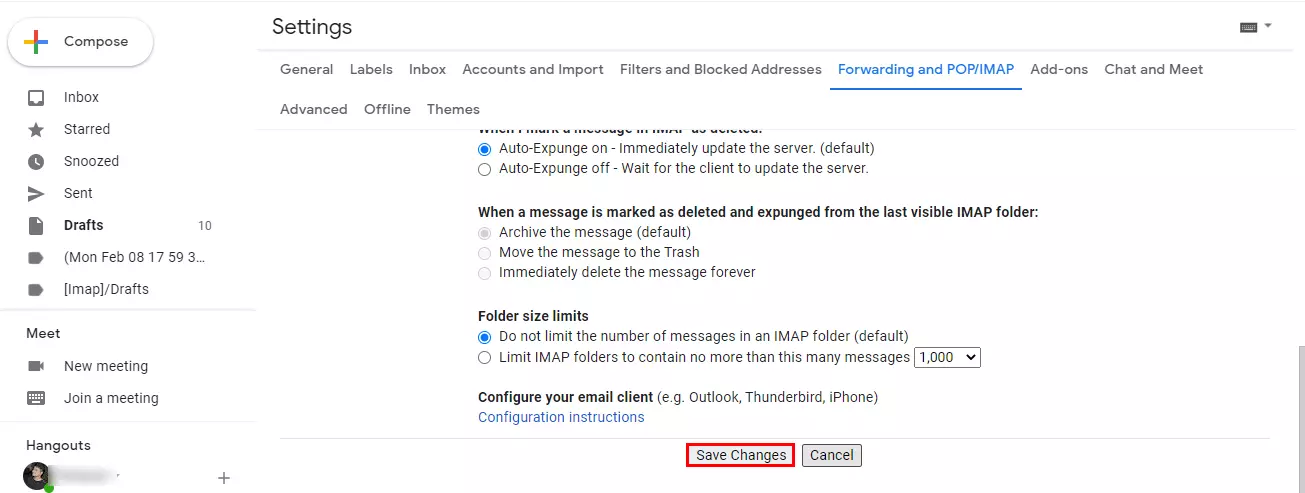
Step 3: Open the Forwarding and POP/IMAP tab.
Step 4: Under IMAP access, select Enable IMAP.
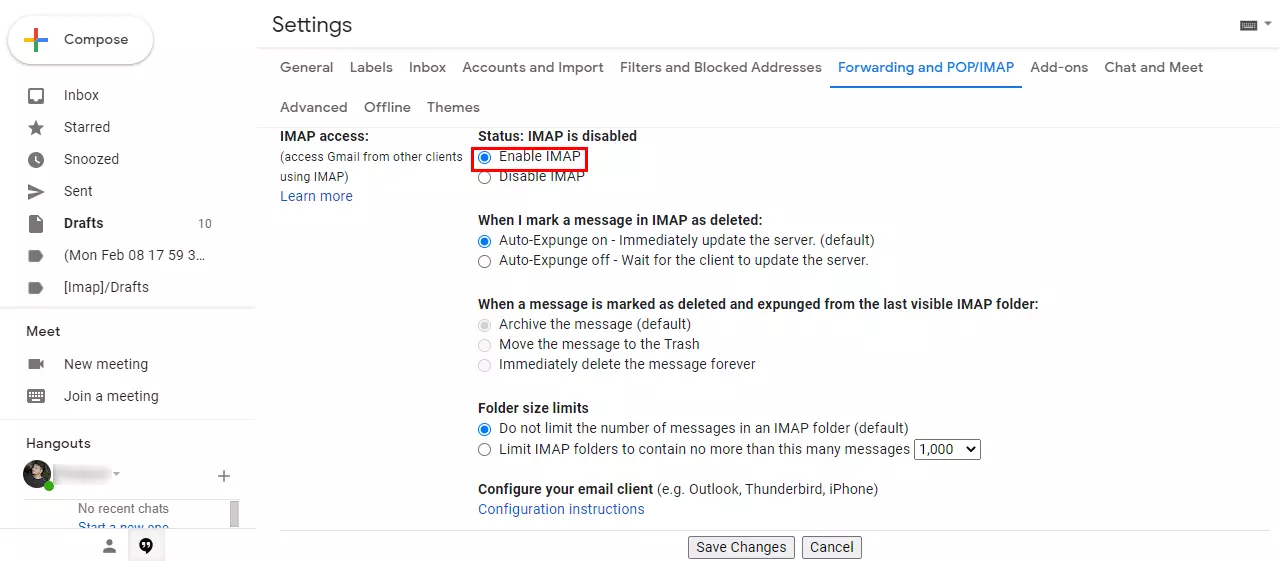
Step 5: Click Save Changes to apply the settings.
Gmail IMAP & SMTP Server Settings
After enabling IMAP, configure the following server settings in your email client:
Incoming Mail Server (IMAP):
- Server: imap.gmail.com
- Port: 993
- Requires SSL: Yes
Outgoing Mail Server (SMTP):
- Server: smtp.gmail.com
- Port (SSL): 465
- Port (TLS/STARTTLS): 587
- Requires SSL: Yes
- Requires TLS: Yes (if available)
- Requires Authentication: Yes
Login Details:
Note: Once IMAP is enabled and the settings are configured, you can easily access your Gmail account using other email clients.